
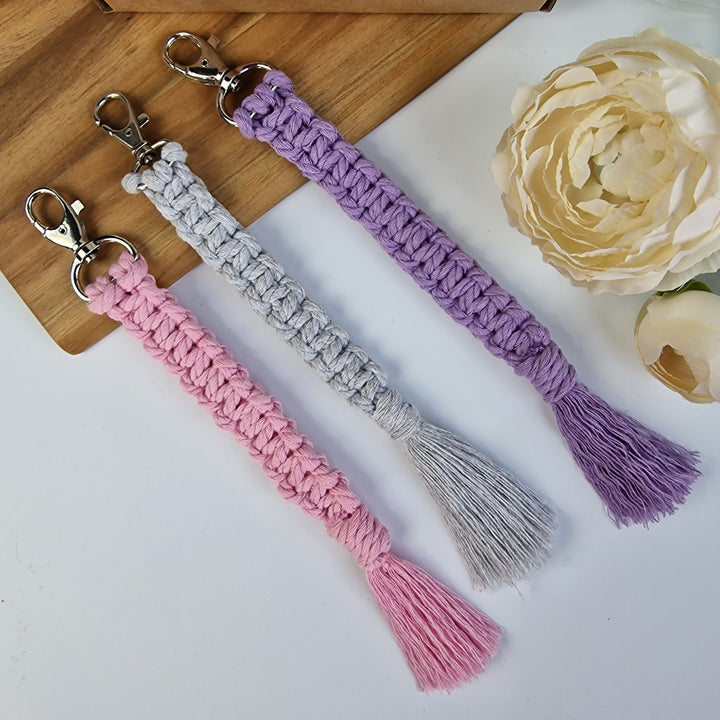
Simple macrame keychain tutorial
I loved macrame and knotting when I was a child so I decided to pick it up and try in my adult life too. It was fun and I wanted to make more and more different things.
I thought that you might be looking for easy macrame tutorial to try this yourself so I wrote this blog - for you and for me (just in case I forget how it's done with all my other projects).
Let's dive in into the process and make your first macrame keychain :)
What you need?
To make your macrame keychain you will need:
• Two 90cm long macrame cords
• One 30cm long macrame cord
• Carabiner
I choose 3mm twisted macrame cord for keychains. You can also try 2mm cord if you want to make it smaller.
To try this macrame project you can also order Mini Macrame Kit from our shop and you will receive macrame cord, carabiner and printed step-by-step tutorial to make this keychain.
Attaching the Cords
First step is to fix carabiner so it is easier to knott. I use cork base, but you can use basic tape to fix carabiner to the table.

Then attach macrame cord to carabiner following these steps:
- Fold the 90cm cord so that one end is 20cm and the other is 70cm.
- Thread the folded end through the carabiner and the open ends of the cord through the cord loop.
- Pull the cord ends to tighten the loop securely around the carabiner.
- Repeat with the other 90cm cord.
Note! The shorter ends of both cords should be in the middle.
Knotting
This knot consists of two steps that repeat.
STEP 1 (Pictures 2-5)
- Cross the left cord over all 3 cords (Picture 2)
- Cross the right cord over the left one (Picture 3)
- Pass the right cord under the middle (short) cords and out through the loop formed by the left cord (Picture 4)
- Tighten the knot so that it snugly fits around the short cords (Picture 5)

STEP 2 (Pictures 6-9)
- Cross the right cord over all 3 cords (Picture 6)
- Cross the left cord over the right one (Picture 7)
- Pass the left cord under the middle (short) cords and out through the loop formed by the right cord (Picture 8)
- Tighten the knot so that it snugly fits around the short cords (Picture 9)

Continue repeating Steps 1 and 2 until the cords are about 5cm long.
Securing the knotted keychain
Use the 30cm cord for tying.
- Fold the end of the cord so that it is 2-3cm above the knot and create a loop about 4cm long downwards (Picture 10)
- Wrap the cord tightly around the knotted cord ends 3-4 times (Picture 11)
- Thread the end of the cord through the loop (Picture 12)
- Holding the lower cord ends, pull the upper end of the cord until the loop tightens and a knot forms. Pull enough so that the knot slips slightly under the wrapped cords (Picture 13)

Trim the wrapped cord ends (you can choose not to trim the lower one) (Picture 14).
Fray the cord ends with scissors (Picture 15).
Comb the cord ends with a small comb and trim them with scissors (Pictures 16-17).

Congrats! You just finished you macrame keychain!
